Fine-Tune Your Photos with AfterFocus

![]()
Photography apps on smartphones are a dime a dozen. Here on BuildMobile, we’ve covered two popular photography apps for Android: Camera ZOOM FX and Instagram. The purpose of these photography apps is pretty clear and straightforward: point, shoot, and add filters. The choice of which photography app you prefer is totally based on your preference.
AfterFocus is one of the newest additions to the photography app landscape. Its premise is simple, but you may soon find yourself using this app as a tool in your mobile photo arsenal. Let’s have a closer look!
Home Screen + Editing Modes

AfterFocus starts out with a gorgeous home screen that prominently features a camera lens and the name of the app. Below that are the three modes for the app. You can take a photo using any available camera app on your device, select a photo you’ve already taken, or you can take two photos. This third option is only for the pro version of the app. Here’s how it works (according to the app’s description):
Take a picture of one object and move slightly to the right to take another picture of the same object, and it will analyze the images and recognize the nearest object, so there is no need to draw the focus area. (Make sure that the background and the distance of the object are far enough and have clear texture to get a great result.)
I’ll take a quick photo here to walk you through the app’s editing modes.
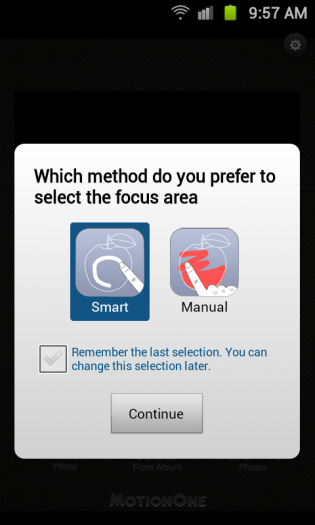
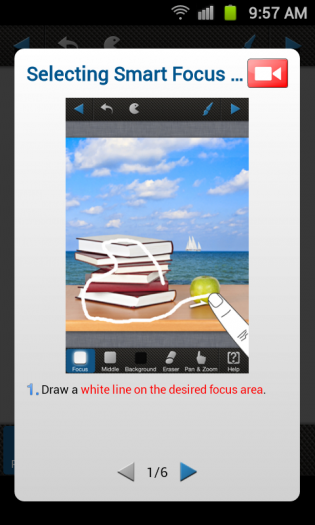
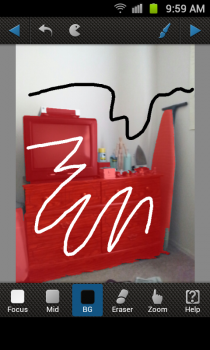
Tap either the Take a Photo or Select from Album icons and you’ll be presented with a choice of two “Focus Areas” — “Smart” or “Manual.” Both modes will give you a helpful video demonstration and a series of steps to create your Focus Area for your image. (If you change your mind later, you can edit this within the Settings.)
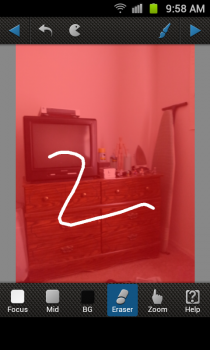
When you’re done, tap the blue arrow in the top right corner to proceed.
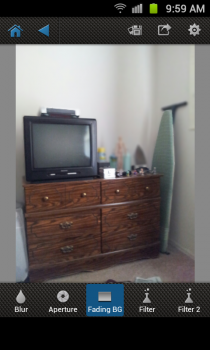
Now you have your finished AfterFocus image. This reminds me a bit of the concept behind Lytro, since you can change and edit your focus areas before saving your photo. There are two settings for the Blur feature (Lens and Motion), five aperture settings (square x2, pentagonal, octagonal, and circular), and a “Fading BG” effect. You can also choose from a number of Instagram-type filters under the two Filter sections:
- Filter: No Effect, Color Mask, B&W, B&W, Sepia, Sepia, XProcess 1, XProcess 2, Vintage, Antique
- Filter 2: Vignetting, Bokeh, Sticker, Sharpen
The different filters under Filter 2 are very interesting, particularly the Bokeh filter for picking up spot lighting. Once you’re done, tap the diskette icon at the top to save your photo, or tap the iOS share icon to share it to Facebook, Twitter, Flickr, Picasa, or another location on your device.
Settings
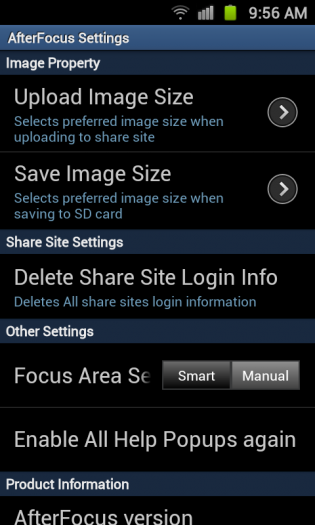
AfterFocus’ settings are pretty spartan compared to most photography apps on Android. You have options for changing your upload image size and your save image size, and you can delete your social network login credentials for Facebook, Twitter, Flickr, and Picasa. You can also toggle your Focus Area setting and re-enable the help popups throughout the app.
Drawbacks
Given how AfterFocus works, it’s really best to use it for editing photos after you’ve taken them instead of using it for quick shots. (After all, the app is called AfterFocus.) One big drawback for me was the resolution of the images once you’ve applied your focus areas. The highest resolution for uploading to a social network or for saving to your device is 800 pixels (not sure if that’s width or height, but I’m assuming it’s 800 x 600 pixels). You can also save images in either 1024 pixels or 1600 pixels, but these are reserved for the Pro version of the application (which at the time of this review doesn’t exist).
Speaking of the Pro version, one of the app’s composition modes (Take Two Photos) is restricted to the Pro version. According to MotionOne, it will debut in May, so I’d like to see what new features are added aside from these two.
The other drawback is the user interface for the app. Some icons used in the editing modes are a bit misplaced. The Pac-Man icon clears your focus areas, but I think that icon could be something clearer like a broom and dustpan. The eraser icon looks a bit like an exclamation mark, and the zoom icon is a pointing finger (I think a magnifying with a plus or minus sign within it would be better).
At first, it seems like sharing is limited to Instagram, Gmail, Facebook, Twitter, Flickr, and Picasa, but if you tap the combined Instagram/Gmail icon, you can then share your photo to several other services you have installed on your device. Again, this is a bit unintuitive, but it could easily be cleared up with the right icons.
I also noticed the duplicate filters and aperture modes (I couldn’t determine what their real difference was by name alone; I had to tap through each one to see) once I went to edit photos. This could be fixed by just adding some proper verbiage to better describe their distinct effects. I also wished that the vignetting, bokeh, and sharpen effects could be edited using a Focus Mask. Instead, they are applied overall to the image after the Focus Mask is rendered.
Conclusion
AfterFocus is a photography app that brings DSLR-like photography styling to your smartphone. You can easily create depth of field effects using the app’s two focus modes, and you can add Instagram-style filters as well. The user interface is a bit rough in some spots and the image output resolutions are small, but these will be addressed in future updates for the app (including the Pro version coming in May).
![]()
AfterFocus is available on Google Play for free and requires Android OS v2.0 or higher to run. Download the app from the Google Play Store link below or by clicking on the Google Play badge provided.


